How to add reviewer request in GitHub
Source: Dery Sudrajat
Hello everyone, how are you? I hope yall safe and in better condition. So today I want to show how to add reviewer requests in Github. My friend in my college much got trouble with this problem when they want to upload an assignment for some subject.
We know GitHub is the most popular cloud code management that can help us As Developers to manage the project with our friend when having collabs, so basically as a developer knowing about these things is important. So let’s go …
#1 Create Github Repository
The first thing that we must do is create a repository in our GitHub like this one.
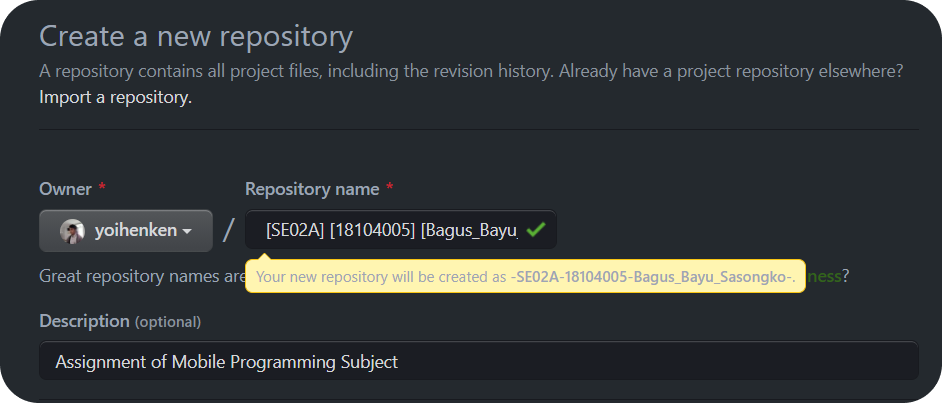
You can create a repo like this, and feel free you want to create for privately or publically, and also you can add a README.md file for initializing the project.
After finish creating the repo let’s add collaborators like our friends or our team leader who sometimes we need their review.
Ok let’s go to Settings → Manage access → Invite a collaborator, like below

We can easily add collaborators using their email or GitHub username like this. All done we already invite the collaborators in our repo. Next, we need to remote this repo to our computer.
#2 Remote the repository
The next step is to clone the repository, wee need to copy the repository URL from our project to Intellij IDEA, why Intellij? because of that easy way to remote with GUI.
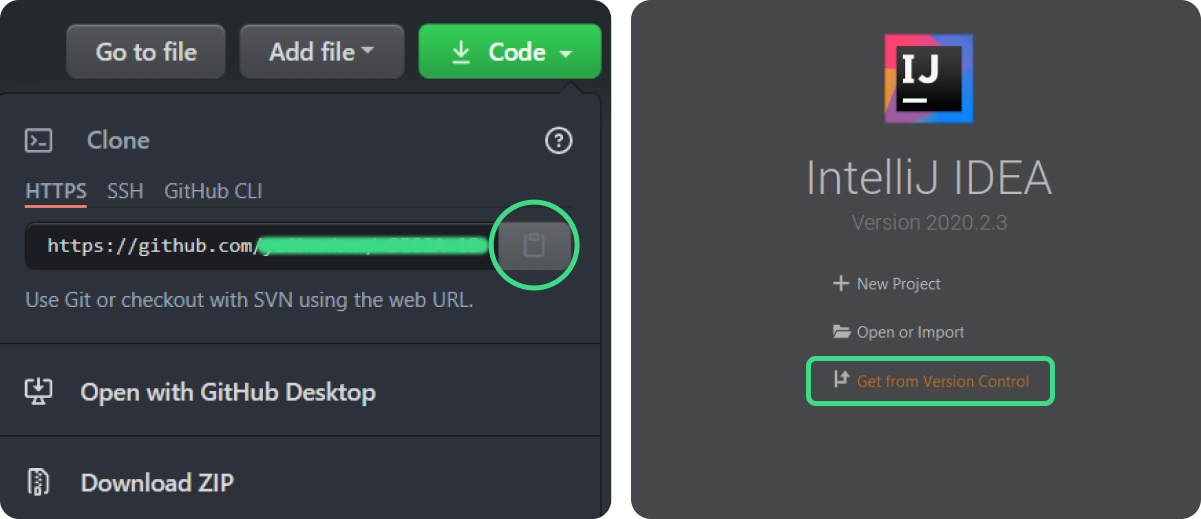
Let’s back to our repository page and find then click the green button “Code” after that copy the URL with click the button marked with a green circle.
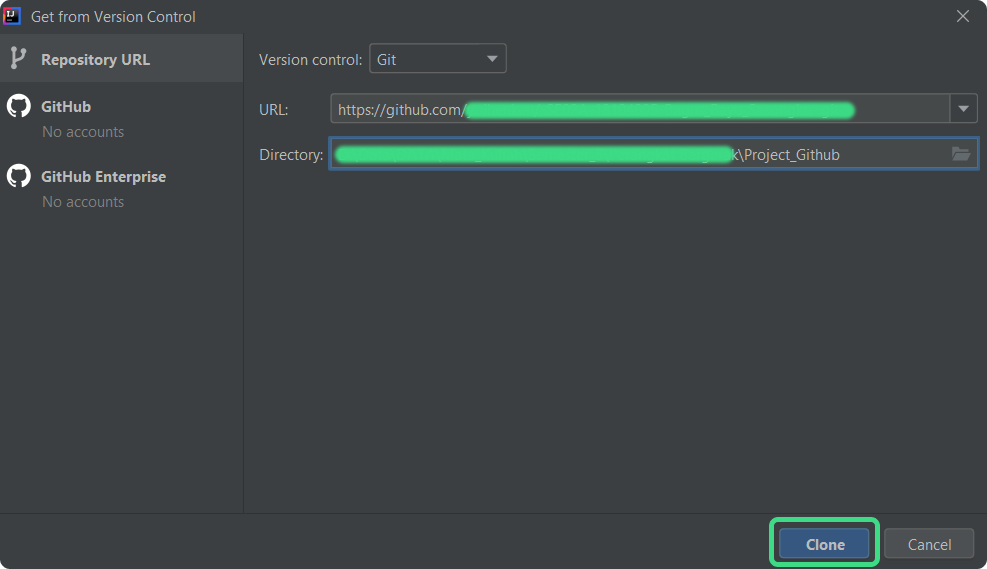
Then open Intellij IDEA to paste the URL, select “Get from Version Control” and paste the URL that we have copied to the URL field and don’t forget to set your project directory, then select “Clone”.
Just wait until the project finishes creating, it needs a few minutes, so u can make a coffee while waiting ☕. after the project finishes creating we need to create some new directory, for example, we have some meeting and some assignment in the meeting, yup we need to re-organize that.
#3 Create a new directory
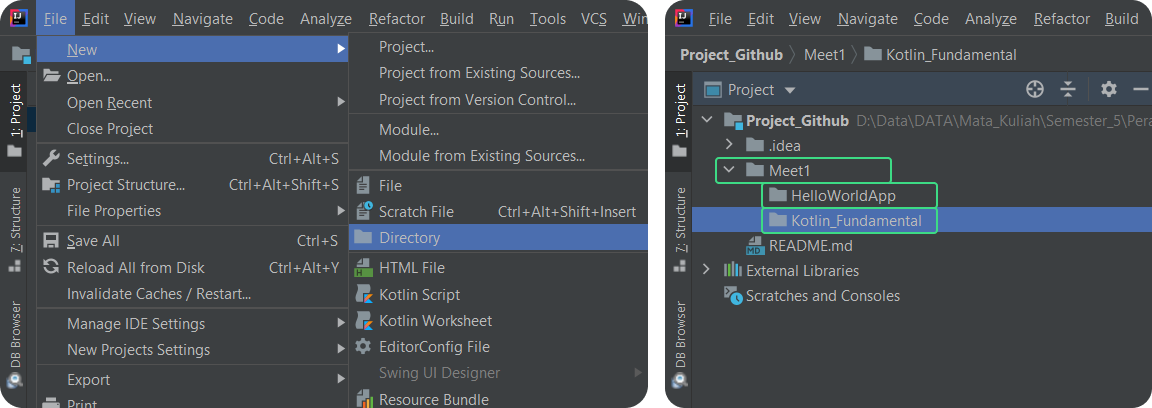
Now for an example, we have some assignments in meeting 1 like u need to understand about Kotlin Fundamental and How to create a Hello World app in Android Studio. So first we create a new directory named “Meet1”, after that create some in the Meet1 directory named “HelloWorldApp” and “Kotlin_Fundamental” like green marked showed.
Well done we have some great progress, let’s continue to fill up the directory with our assignment.
#4 Create a new Android Project
Now open up our Android Studio and try to “Create New Project”. We will create an Android project with Kotlin, like usual we create using the Empty Activity app template after that, we need to set the Project name and project directory.
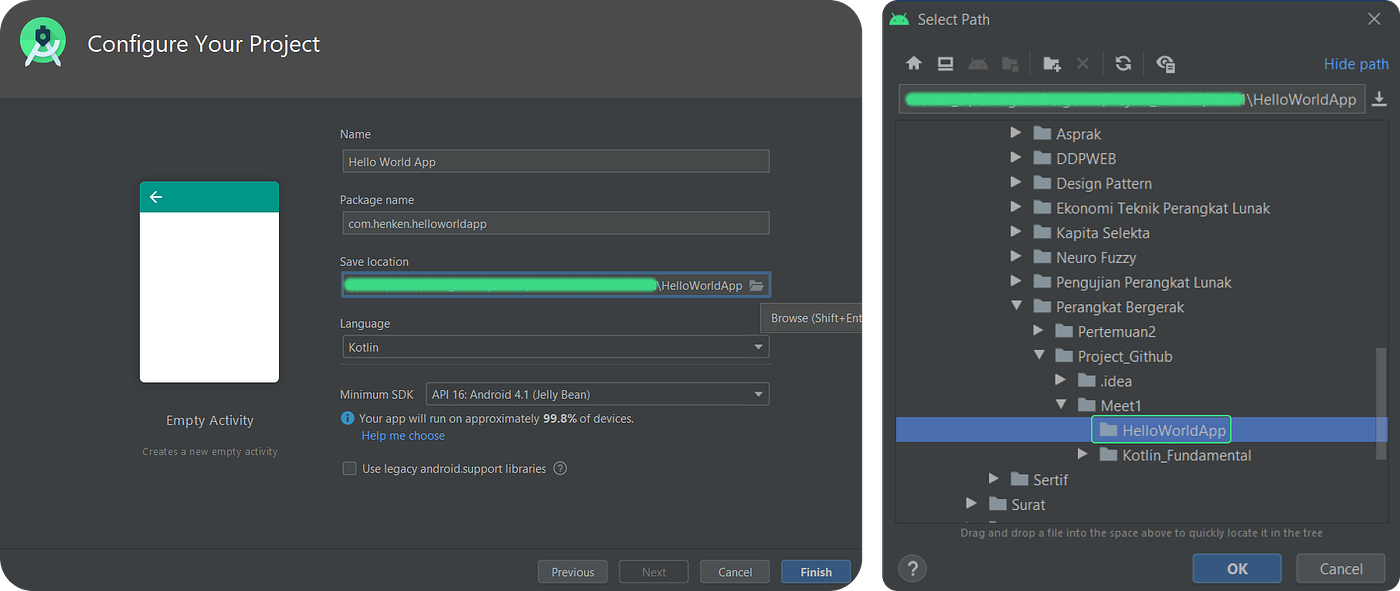
Set App name to “Hello World App” and set the directory to the path directory that we have created before. Select ok then wait until the project finish built also don’t forget to try running your app in an emulator or device to make sure it works properly.
Great, we already did create Hello World App, next, we fill up the Kotlin Fundamental assignment.
#5 Create Project Kotlin Fundamental
Let’s back to our Intellij that already opened before, after we create an android app the content file could be like this.
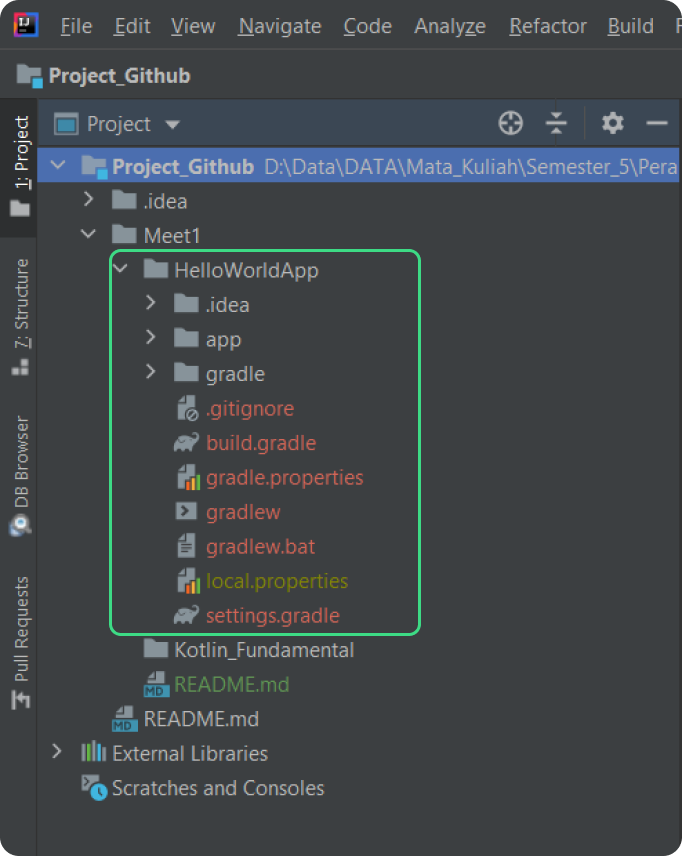
Now in the HelloWorldapp folder already fills up with our Android project that we created before. That’s great, now close the project first by select File → Close Project, it’ll bring us back to opening the IntelliJ idea.
Let’s Create a new project for Kotlin Fundamental assignment

Select “New Project” and after that don’t forget to select Kotlin_Fundamental folder which we already created before, and select “OK”. Just wait a moment until the project finishes creating.

Then try to fill up your assignment and don’t forget to run the file to make sure it was work. Alright all done, we have created a new project for Kotlin Fundamental assignment. Next close this project first and back to the previous project in Intellij, we want to push out the assignment to a new branch in our repository, let’s go.
#6 Push Project to a new branch.
Now back to the previous Project that remoted with Github repository, we’ll create a new branch named “Meet1” like below
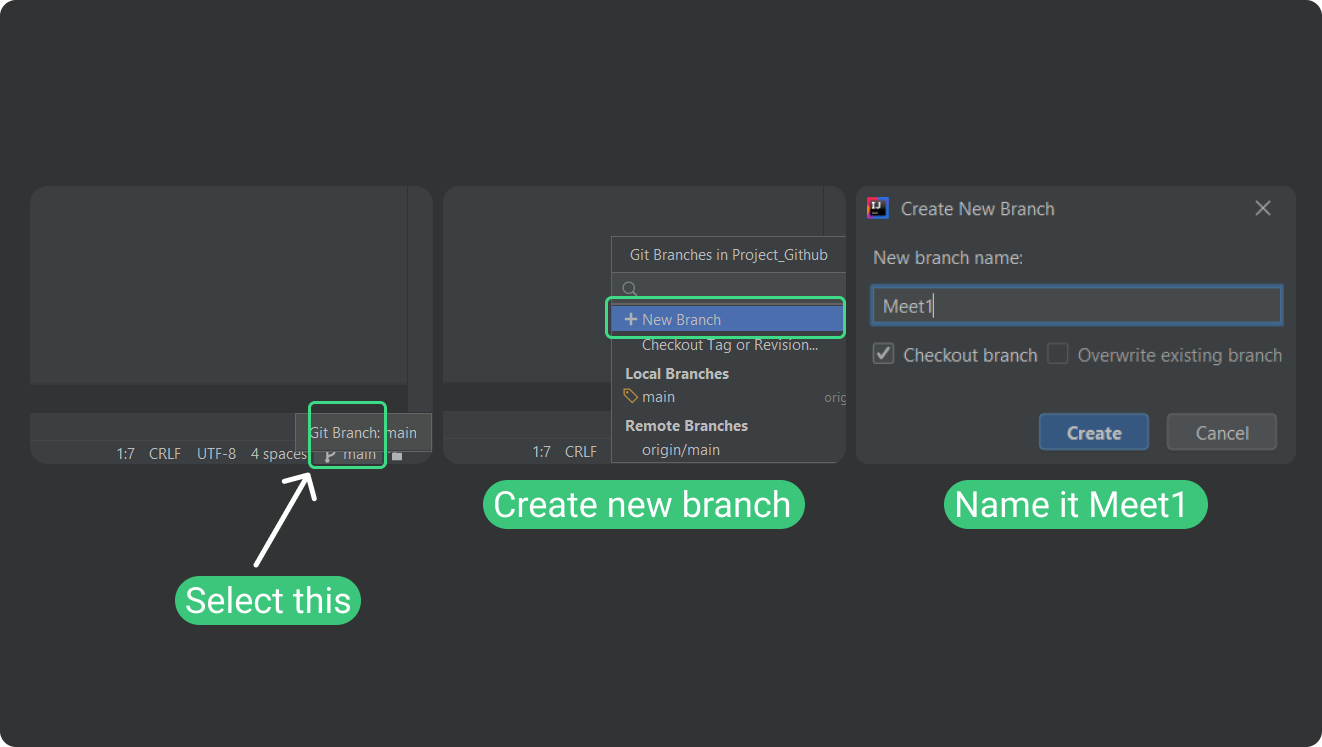
Select the green mark named “main” and select “New Branch” after that name it “Meet1”. After finish creating the new branch, it looks like below
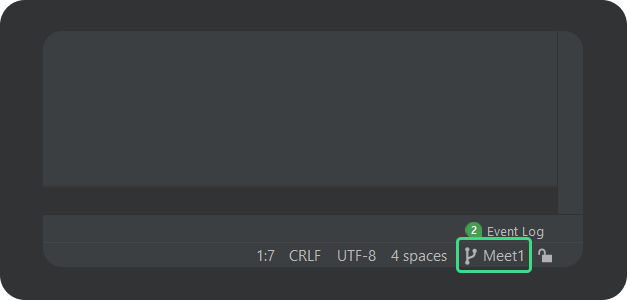
Look at the green mark, we know before we create a new branch it named Main, now it named Meet1, that’s mean the branch that we check out or our work branch is branch Meet1.
Now we already create a new branch, let’s commit our work 🎉.
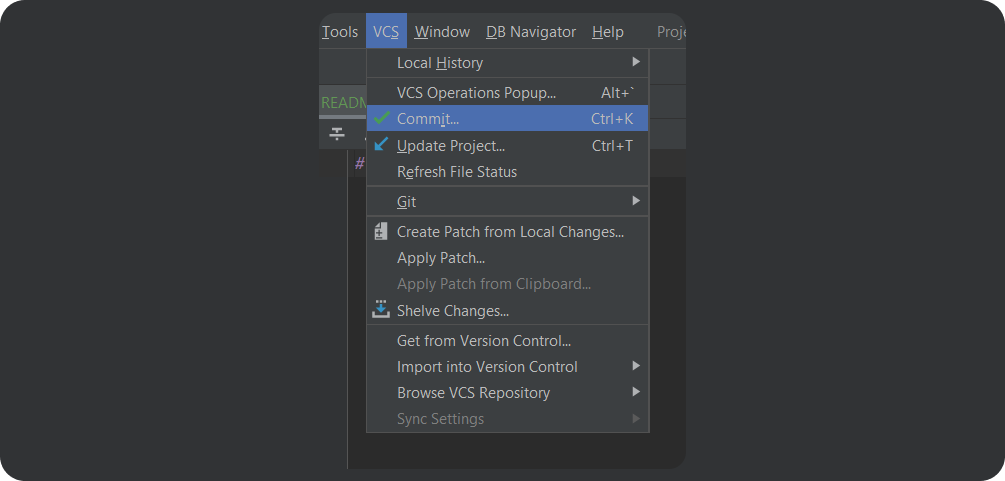
Oke, first we select VCS(Version Control System) in Intellij Toolbar then select commit or you can quickly use shortcut CTRL+K or ⌘+K.

The next step is to add all files and commit them. we’ll meet check named “Unversioned Files” just check it like green mark above. Then add “Commit Message” like above you can add the message when you commit them, write the specific things there. If you have finished just select “Commit”.
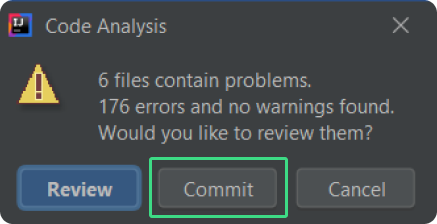
If there is any problem pop up like this just ignore it and select Commit.
Now we push all commit to our new branch ✨
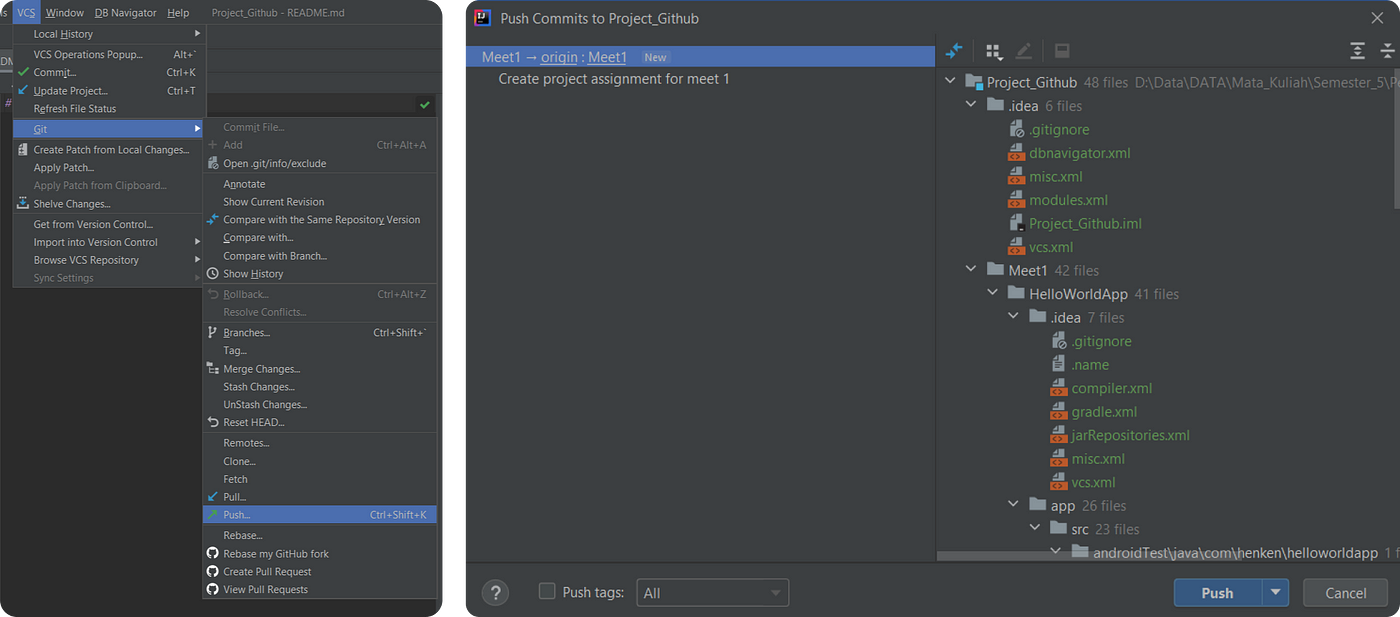
Select VCS → Git → Push or by using shortcut CTRL+SHIFT+K or ⌘+⇧+K, then will pop up like the right image, and just select Push.
Well done now let’s check our GitHub repository it must appear like this if looks like this you success push in the new branch congratulation 🎉. Now we just do Pull Request.
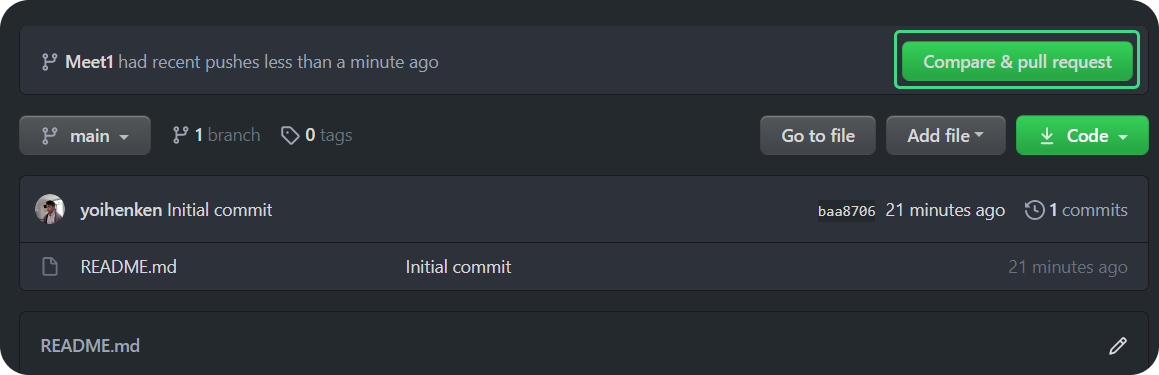
#7 Open Pull Request and Add Reviewers
now the last step is Open Pull Request just select Compare & Pull Request like the green mark above.
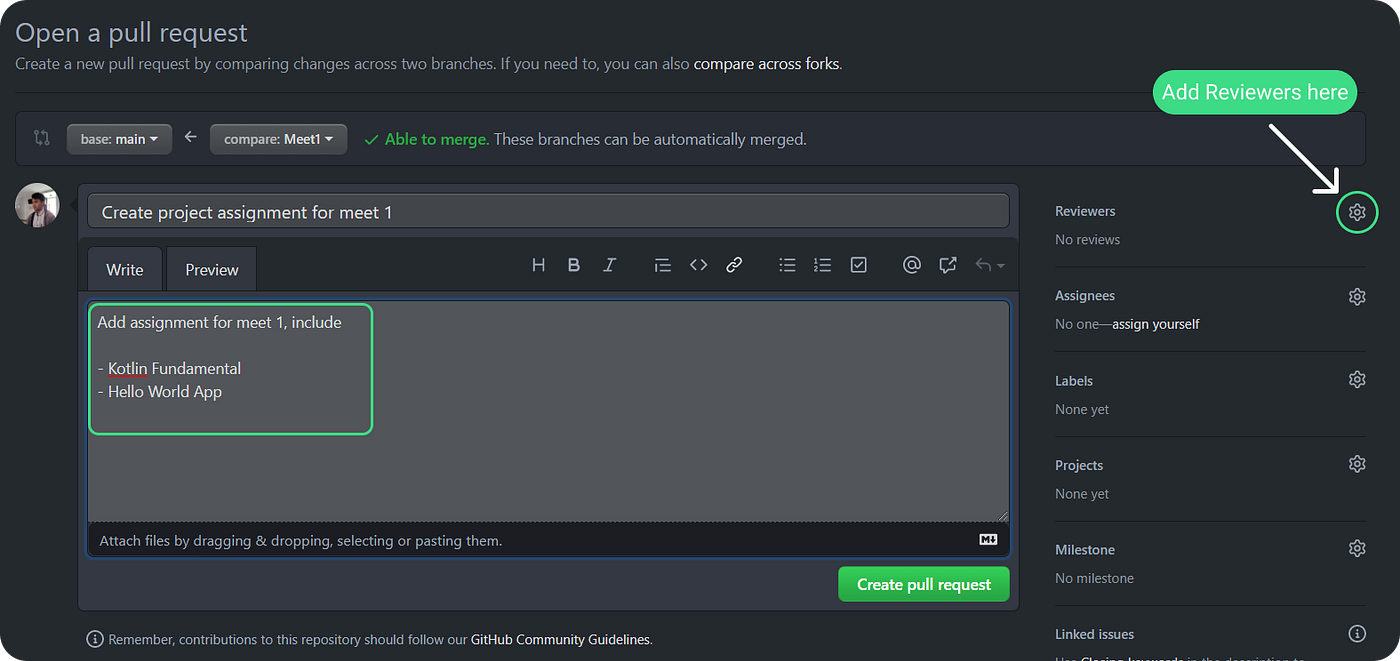
And you can add a Pull request message like the square green mark above, after that select the circle green mark* to add reviewers.
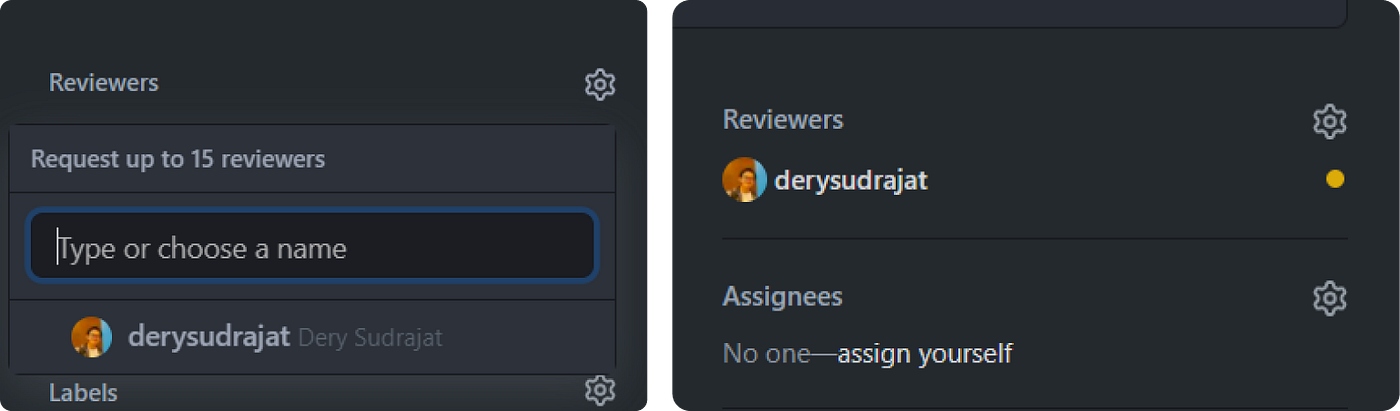
You can choose the name of the reviewer to add, if you finish choosing the reviewer it must be like the right image. All done, next just select Create pull request button.
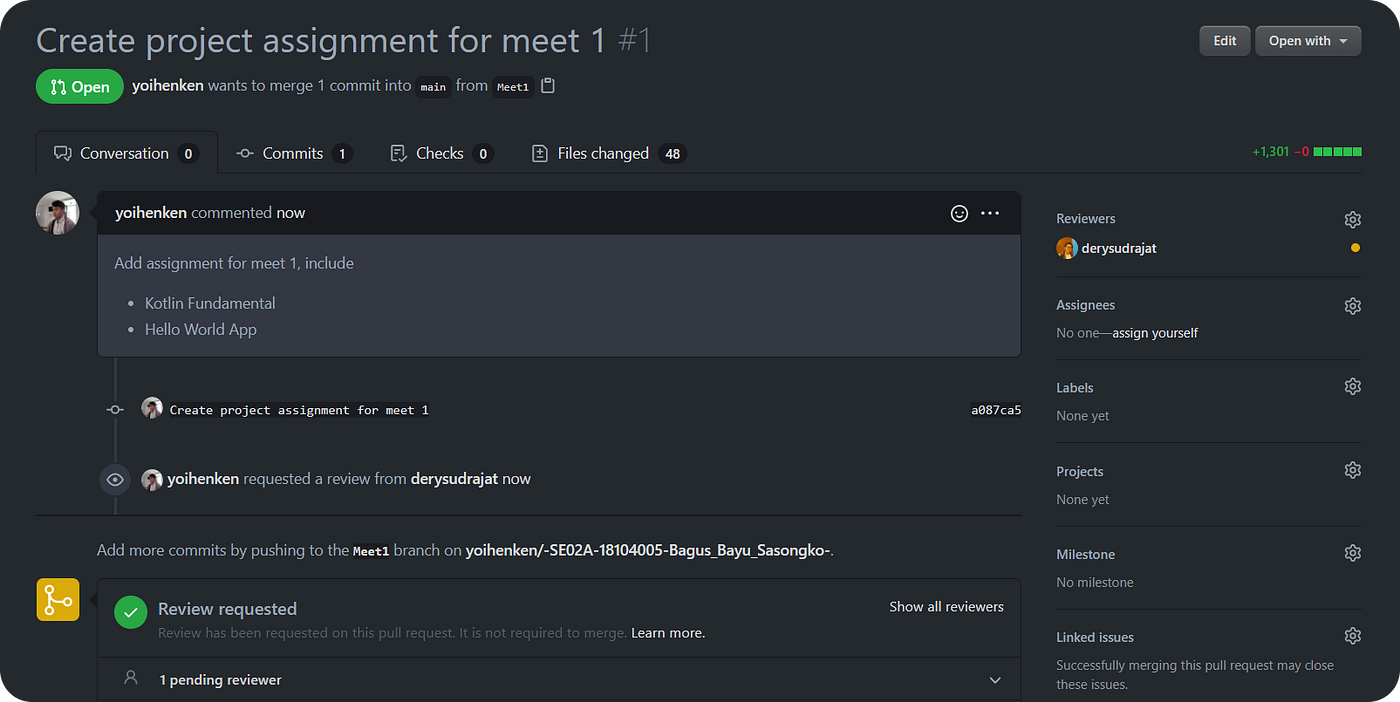
Yey that’s it if you follow all steps above the result must be like this, All done you just waiting until your reviewers approve or reject your pull request.
Awesome, now you can add a reviewer to your GitHub project repository yuhuu let’s celebrate it 🎉🥳, all the screenshot Is made by my friend, because it makes it easier to understand thanks Bagus Bayu you can clap this if you feel it helpful and feel free to get in touch with us in Instagram or Our Github below
Instagram : @derysudrajat, @bagusbs22
Github: @derysudrajat, @yoihenken
Thanks, everyone keeps safe and see you later 👋